In this article
The distinction matters when a scanner shows “Camera” beside an app. That label may come from the signed application or its configuration. It does not necessarily mean the camera is on, that the app has used it, or that access is currently allowed.
Start with the macOS privacy setting
Open Privacy & Security, choose Camera, and find the app you are checking. Inspect its switch before drawing a conclusion from a capability report. Apple's camera access guide explains that this list contains installed apps that have asked to use the camera.
If an app is absent, do not turn that absence into a broad safety verdict. Check that you are looking at the right app and the right access category. Apple also notes that built-in apps such as FaceTime and Photo Booth have camera access without the same permission step. A browser website's camera setting is another layer to check inside the browser.
For the narrow question “Did I allow this third-party app to use the camera?”, the macOS setting is the appropriate first stop. You do not need an entitlement inspector to change that switch.
Separate the three layers
A camera-related finding can come from three different places. Keep the source beside the finding so that its meaning survives when you share a screenshot or write a support request.
| Layer | Example | What it tells you |
|---|---|---|
| Signed entitlement | com.apple.security.device.camera | The signed app includes that capability declaration |
| Usage description | NSCameraUsageDescription | The app supplies a reason for requesting camera access |
| Runtime authorization | The app's camera permission state in macOS | Whether that access is currently authorized |
Apple's Camera entitlement documentation explicitly separates the entitlement from the user's permission requirement. The entitlement is relevant to App Sandbox or Hardened Runtime configuration; it is not a substitute for consent.
A purpose string supplies the explanation shown during a request. Apple's media capture authorization guide describes the separate authorization flow and states such as not determined, denied, restricted, and authorized.
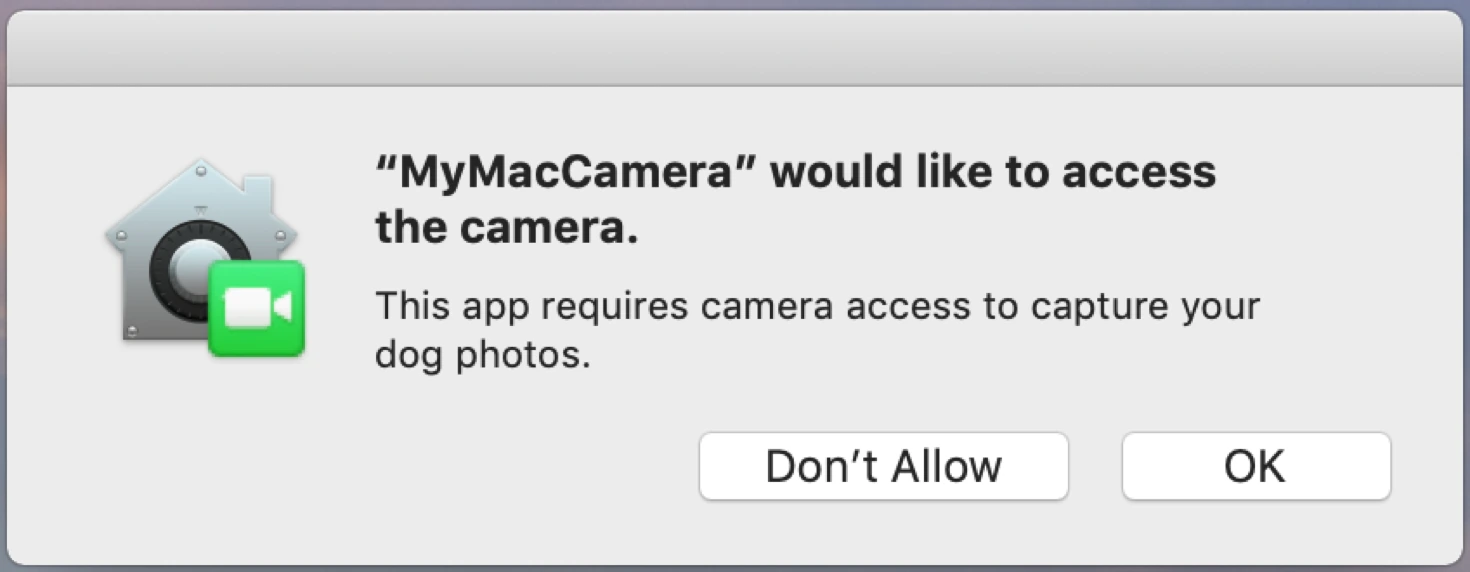
Source: Apple's media capture documentation, retrieved September 23, 2026. This is Apple's example dialog with older macOS styling, not a current Telegram prompt or a screenshot from our test.
The reason in a dialog explains what the developer says the feature needs. Your response to the request is a different fact. Reading the explanation from an app bundle cannot recover that response.
A read-only check of a real application
We inspected the installed Telegram 7.2.9 application on September 23, 2026. The check read the application's version and camera purpose string from its Info.plist, then inspected its code-signing entitlements.
The signed entitlement output included com.apple.security.device.camera set to true. The usage description gave video messages and video calls as the reason for requesting the camera. Those two observations establish what this installed build declares.
They do not establish its current camera permission. We did not read the privacy database, enable camera access, start recording, or infer a grant from the presence of either key.
For someone already comfortable with Terminal, these are the read-only commands used for the relevant checks:
- Read the signed entitlements:
/usr/bin/codesign -d --entitlements - /Applications/Telegram.app. - Read the camera purpose:
/usr/libexec/PlistBuddy -c 'Print :NSCameraUsageDescription' /Applications/Telegram.app/Contents/Info.plist.
The path is specific to that installation. A missing key or a different output from another application needs interpretation in that application's context; it does not mean the application has no access to anything.
This example gives a concrete way to label the result accurately: “The installed build declares camera access” is supported. “Telegram currently has camera permission on this Mac” would require different evidence.
Do all entitlements correspond to privacy switches?
No. Avoid turning the camera example into a rule that every entitlement produces a user prompt or has a matching switch in Privacy & Security. Entitlements cover more than the familiar camera and microphone categories.
Likewise, App Sandbox, an entitlement, and a privacy decision answer different questions. Apple's App Sandbox configuration guide describes restrictions and the capabilities an app needs within that model. It does not make an entitlement list a complete record of what a user has approved.
Other categories have their own policies. For example, Apple's platform security reference on file access describes consent and settings requirements for protected files, accessibility, and automation. Check the documentation for the specific category instead of assuming that a camera workflow applies everywhere.
Use a small evidence checklist
When reviewing an unfamiliar access declaration, record these items:
- The exact app and version. Two builds, helper applications, or similarly named apps may not have identical declarations.
- The source of the finding. Was it a signed entitlement, an
Info.plistusage description, a macOS switch, or observed activity? - The feature it could support. Compare the stated reason with a feature you expect to use. A plausible reason is context, not proof of trustworthy behavior.
- The current decision in macOS. Inspect the relevant access category. Do not substitute a declaration list for the setting.
- What remains unknown. For example, the declaration alone does not tell you whether the feature was used yesterday.
This separates facts you can check now from questions that need different evidence. It also avoids granting permission merely to complete an inventory.
Where VaultDog helps
VaultDog's application passport reads supported usage descriptions and signed entitlements, groups the declared access by category, and offers links to the corresponding macOS privacy settings. In the current interface, it explicitly identifies macOS as the source of truth for whether access is allowed.
That is useful when you want to start with one installed application and understand which declarations deserve a closer look. The getting started guide shows the passport workflow; the privacy page explains VaultDog's own data handling.
Use the passport to organize the questions, then use macOS to inspect or change the relevant grant. A declared capability, a permission decision, and evidence of actual use should stay separate in your notes.